
Aaaannnddd… Here’s another quick behind the scenes post about making my second Lotus Seven Club track day introduction video.
If you want some background on what this is all about then this post has it all ( 2021 Castle Combe Track Day INTRO – Lotus Seven Club YouTube Video ), and so I won’t repeat myself here.
Suffice to say, this post is about the Cadwell Park 2021 Track Day. This track day differed from the Castle Combe day posted before, in that it wasn’t set up with a focus for novices. The club still provides instructors on these days, but there’s not the same initial briefing session in the morning that’s dedicated to novices, nor is there quite as much hand holding.
Having said that, Simon Maitland spends many hours talking to people who are attending track days by phone and via email, and is always more than happy to help anyone with whatever level of question they have.
If you haven’t seen it already, the YouTube video can be found here:
Unfortunately I couldn’t attend this track day in person, and its been many years since I attended Cadwell Park. So, one of the main differences with this video from Castle Combe was that I had to rely solely on Simon for information that went into the video. On the whole though, everything worked out pretty well I think. And so far nobody has come back with any errors in the video, unlike the first one.
So, to the core of this post – behind the scenes of making the video.
The Detail
As is customary for my posts, and done whether you like it or not ( 😀 ), here’s a more detailed break down of what it took to make this video. On the whole the process was the same as the Castle Combe video. So… (I’m sure with much relief)… you’ll be pleased to hear that I’m only including what’s different this time.
There are three main differences from the Castle Combe video:
- Simon’s piece to camera was a piece to microphone instead
- A new animation showing overtaking zones
- A new map animation of lap progress during the track segment
I had hoped, seeing as we’d got the format of the video nailed down in the Castle Combe video, that I’d have a shorter edit when making this video. However, the last two tasks on that list above were my undoing and in the end I probably spent another 50+ hours on this video. I recorded 52 hours in my diary, but I suspect I missed quite a few hours too.
So here’s some excruciating detail on the differences between this video and the Castle Combe video.
Simon’s Voice Over
We decided for this second video that we didn’t actually need Simon to do his speech as a video. We could re-use footage from the Castle Combe video and use only a voice-over for the remainder that was unique to Cadwell Park.
This greatly reduced the effort Simon needed to put into the recording of his speech – no blankets required!
However, it meant that I needed to find some more stills, animations and video to completely cover everything Simon was going to provide as audio only.
I found the extra footage in a few ways. Firstly by using some extra stills when talking about how great track days are. But secondly, I created a new animation to fill in a few seconds while Simon was talking about overtaking zones.
Once Simon had delivered the speech’s audio file to my Dropbox account I was able to get to work on it. I put it through my usual processing steps in iZotope RX8:
- De-reverb
- De-plosive
- Equalisation
- Normalisation to -20dB LUFS
I also had a go at getting rid of a buzz that was in Simon’s audio. But, I really struggled to completely eradicate it, as it seemed to be quite wide spectrum noise. If you listen to the final video with headphones you can hear a tizzing effect (technical term) in Simon’s voice that I couldn’t remove, even with spectral editing.
You can also hear that the audio of the second half of the final video is tonally very different to the first half. That’s because Simon recorded the two audio sessions on very different devices and in very different places. We may have to re-think how we record Simon’s audio in any future videos.
Overtaking Zones Animation
Here’s the final animation I’m going to talk about here…
Even in the first Castle Combe video I’d wanted to have a graphic that showed where you could, and could not overtake on a track day. As Simon points out, you can overtake on the straights but not in the braking zones or the corners. That seemed to be crying out for a graphic, diagram or even better an animation.
I played around with a few ways of doing this for the Castle Combe video but ran out of time. Initially I tried to do an overhead diagram of a track with some cars on it – but I couldn’t get anything that looked polished enough.
I then thought to use the driving simulator Assetto Corsa (AC). There’s all sorts of setup you can do with AC, and there are some fantastic renders of Caterham’s in the game along with all the UK circuits we were interested in. But again, I ran out of time to create something that I could get a screen capture of and so I didn’t include any graphic in the Castle Combe video.
Now, moving on a few weeks to the Cadwell Park video and I thought I’d have another go at the idea. I thought about the 3D modelling software I regularly use, as I have 3D Caterham models in both Blender and Fusion 360. They have awesome and average animation engines respectively. I’ve tried to use Blender for animations (like the intro to my 2018 Taffia Fish and Chip Run video), so know how time consuming it can be. I also know that Fusion 360’s animation tools are simple but don’t give as much control, or such good results, as Blender. So, due to time constraints I was going to need to do something cheaply (in time), and therefore opted to give Fusion 360 a go.
Even though Fusion 360’s animation is simple, I think the results turned out pretty well in the end.
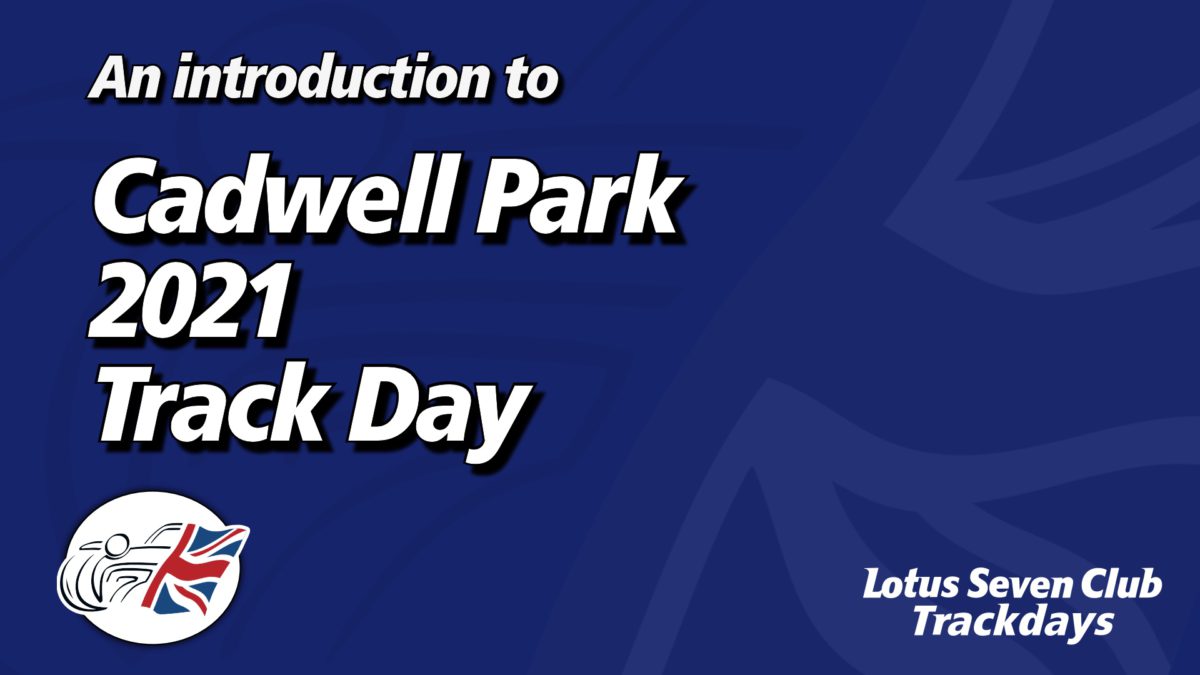
From the start, I knew that I wasn’t going to be able to animate the wheels rotating in Fusion 360 – at least I didn’t have time to investigate how. So I decided that what I would do is have three scenes, one for each of the overtaking scenarios. Each scene would have a pair of cars, and then I could animate between the scenes without moving the cars themselves, and so not needing to animate any wheels.
Here’s the whole “road” that I modelled in the “Design” tools of Fusion 360 – a big long road with six cars and some overlays on the road to give the green and red zones I wanted to indicate.
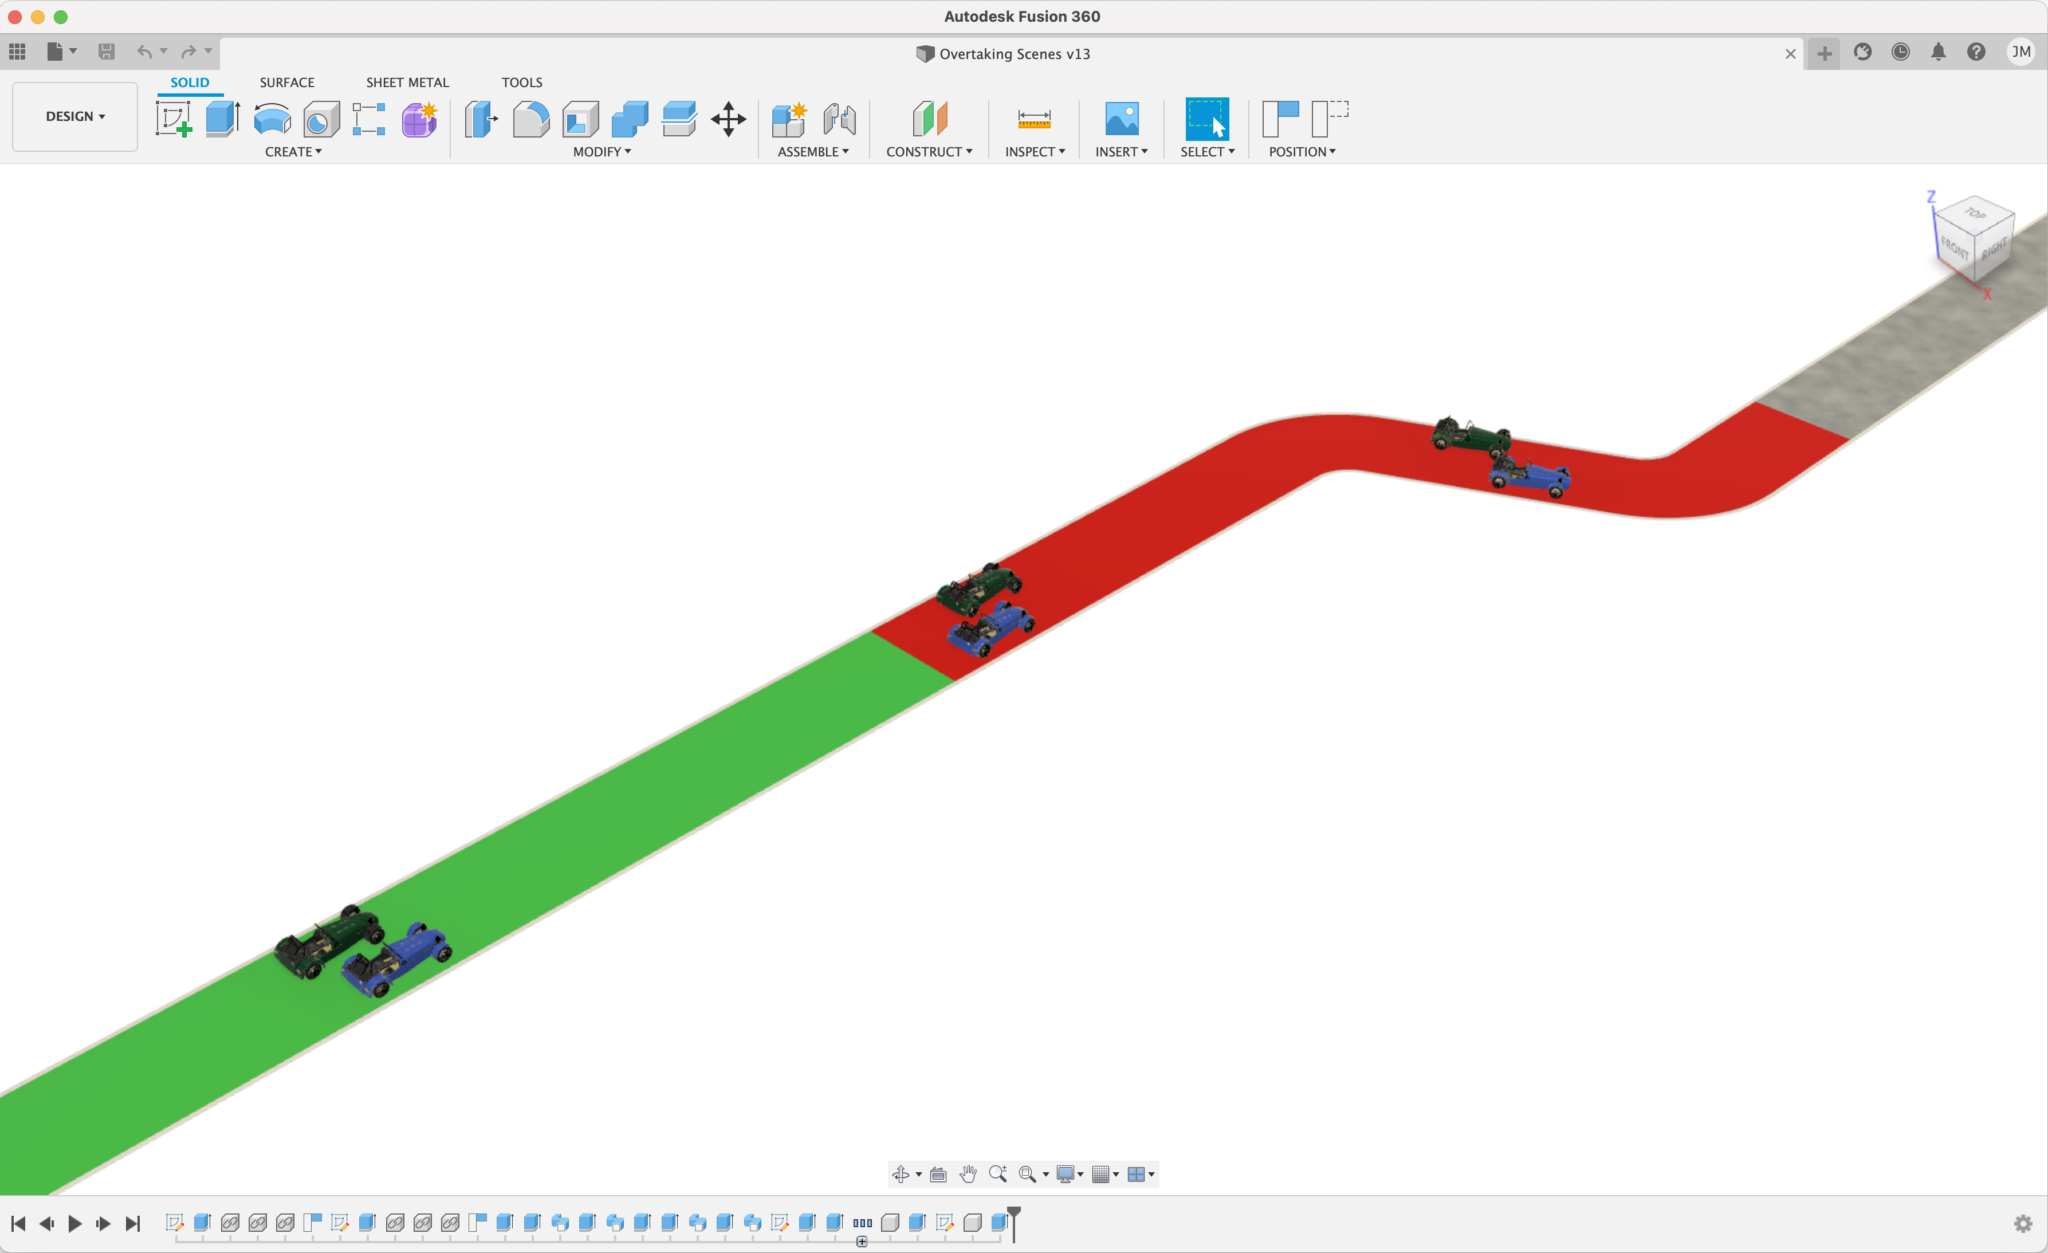
Now here’s each of the three scenes as they appear in the animation tools.
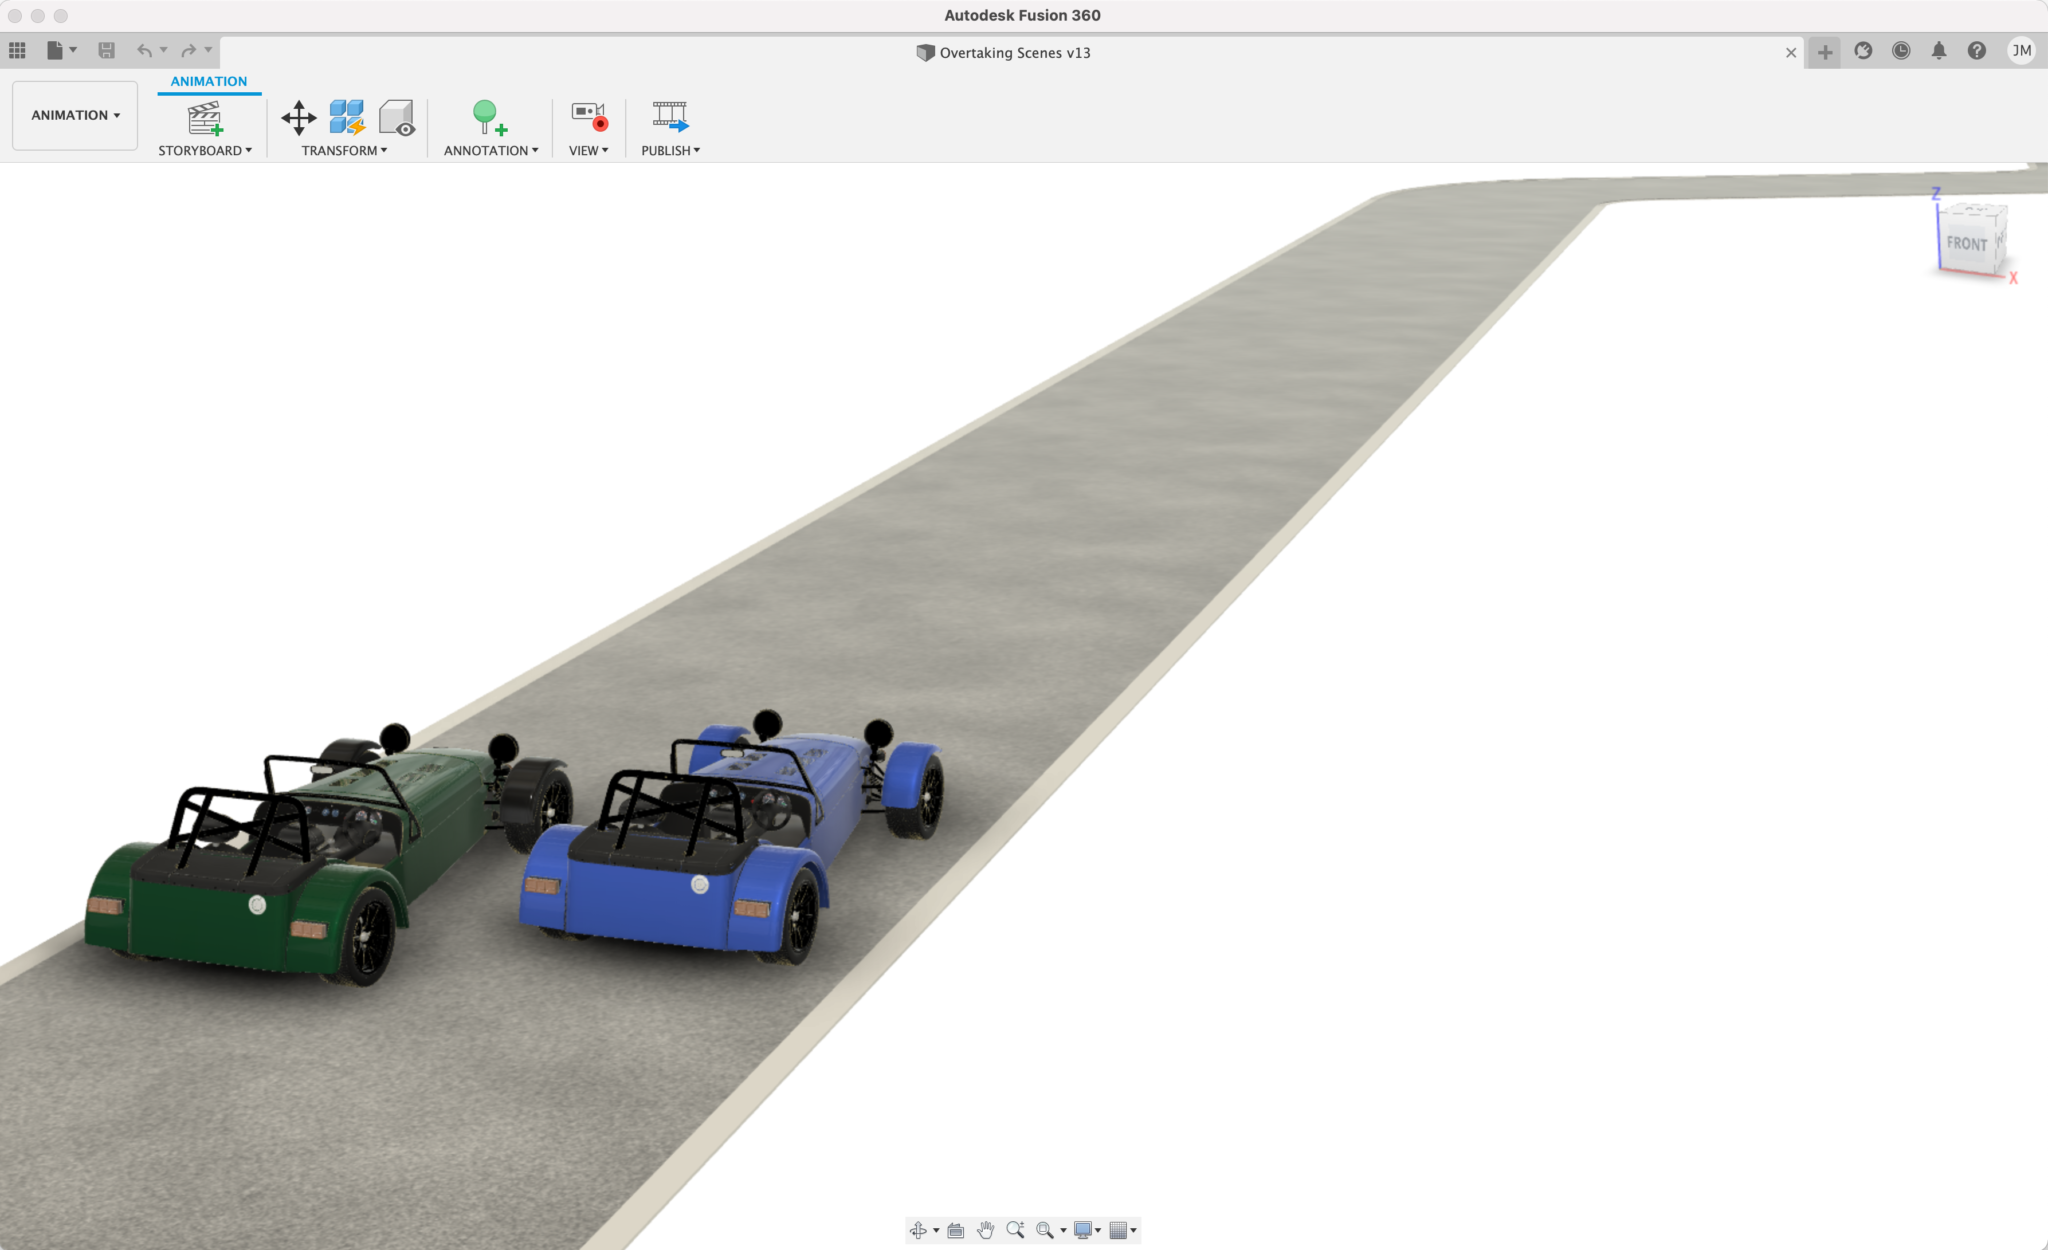
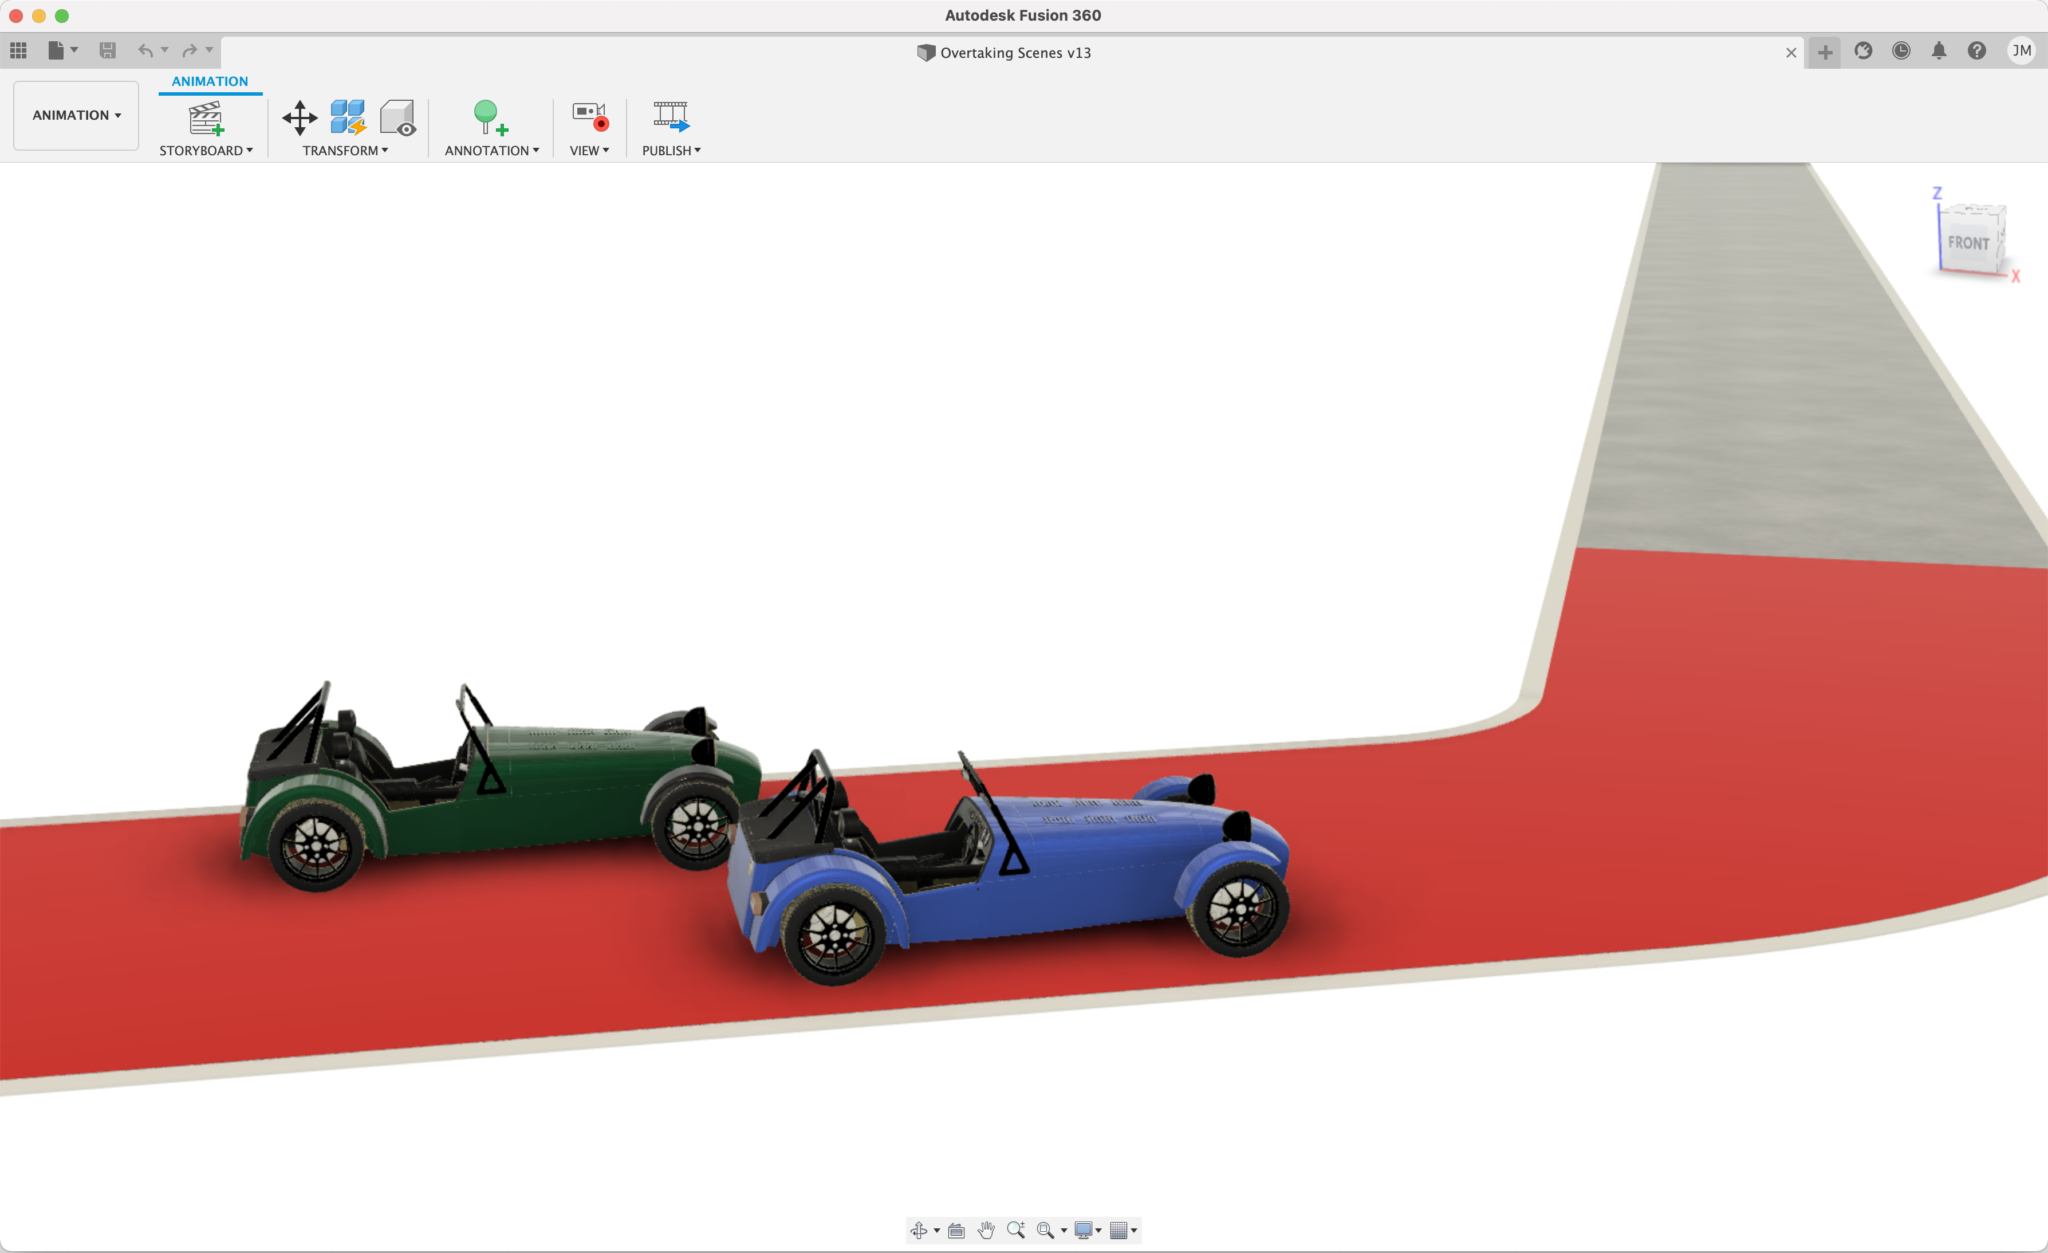
And when they were all animated this is the Fusion 360 video that drops out of the animation.
And then… that animation is imported into Fusion where I could add the final text along with appropriately placed ticks and crosses. It’s all a question of using the right tools.
The ticks and crosses were animated in Apple Motion. You can’t really create complex vector graphics in Final Cut Pro, even though you can sort of animate things with key frames. Motion is the right tool for animating complex (or even simple) vector graphics in the Apple MotionVFX tool chain.
The animation of a 3D Caterham model was simple to create in Fusion 360. Ticks and crosses could be easily animated in Motion. Those two along with a text overlay were easily combined in Final Cut Pro. The trick, and where the experience comes in, is knowing which tool to use at the right time. It’s a lot like woodworking: good tools make the job simple, but experience creates a masterpiece 😉.
Another trick I used in this animation was to make the Fusion 360 animation twice as long as I thought it would be in the final video. I could then speed up or slow down the clip, to make it fit Simon’s voice-over, without the risk of dropping any frames.
Track Position Animation
Here’s a section of what I’m going to talk about next…
This bit of work came from wanting to show graphically where Simon was on his lap demo laps. I’d also wanted to include it in the Castle Combe video too, but like the overtaking zone animation, I ran out of time for this too.
This effect is standard F1 graphics fodder and what you see a lot of action camera tool chains doing for you. It’s also a standard post-production item for in-car, track orientated, camera systems like Race Logic.
When creating this animated overlay, one of the options would have been to take the GPS and intertial data from Simon’s camera footage and create an animation automatically from that – like Garmin, GoPro or Insta360 do. But I soon realised I didn’t have the time for this – even though I’ve done work these data in the past (from GoPro video meta-data streams mainly). The GPS data from action cameras is also often quite noisy, and I didn’t have time to create something that was up to my OCD thresholds.
So, I decided to take the easy route and create an animation of a (green) blob going around the track map, and to do it in Apple Motion.
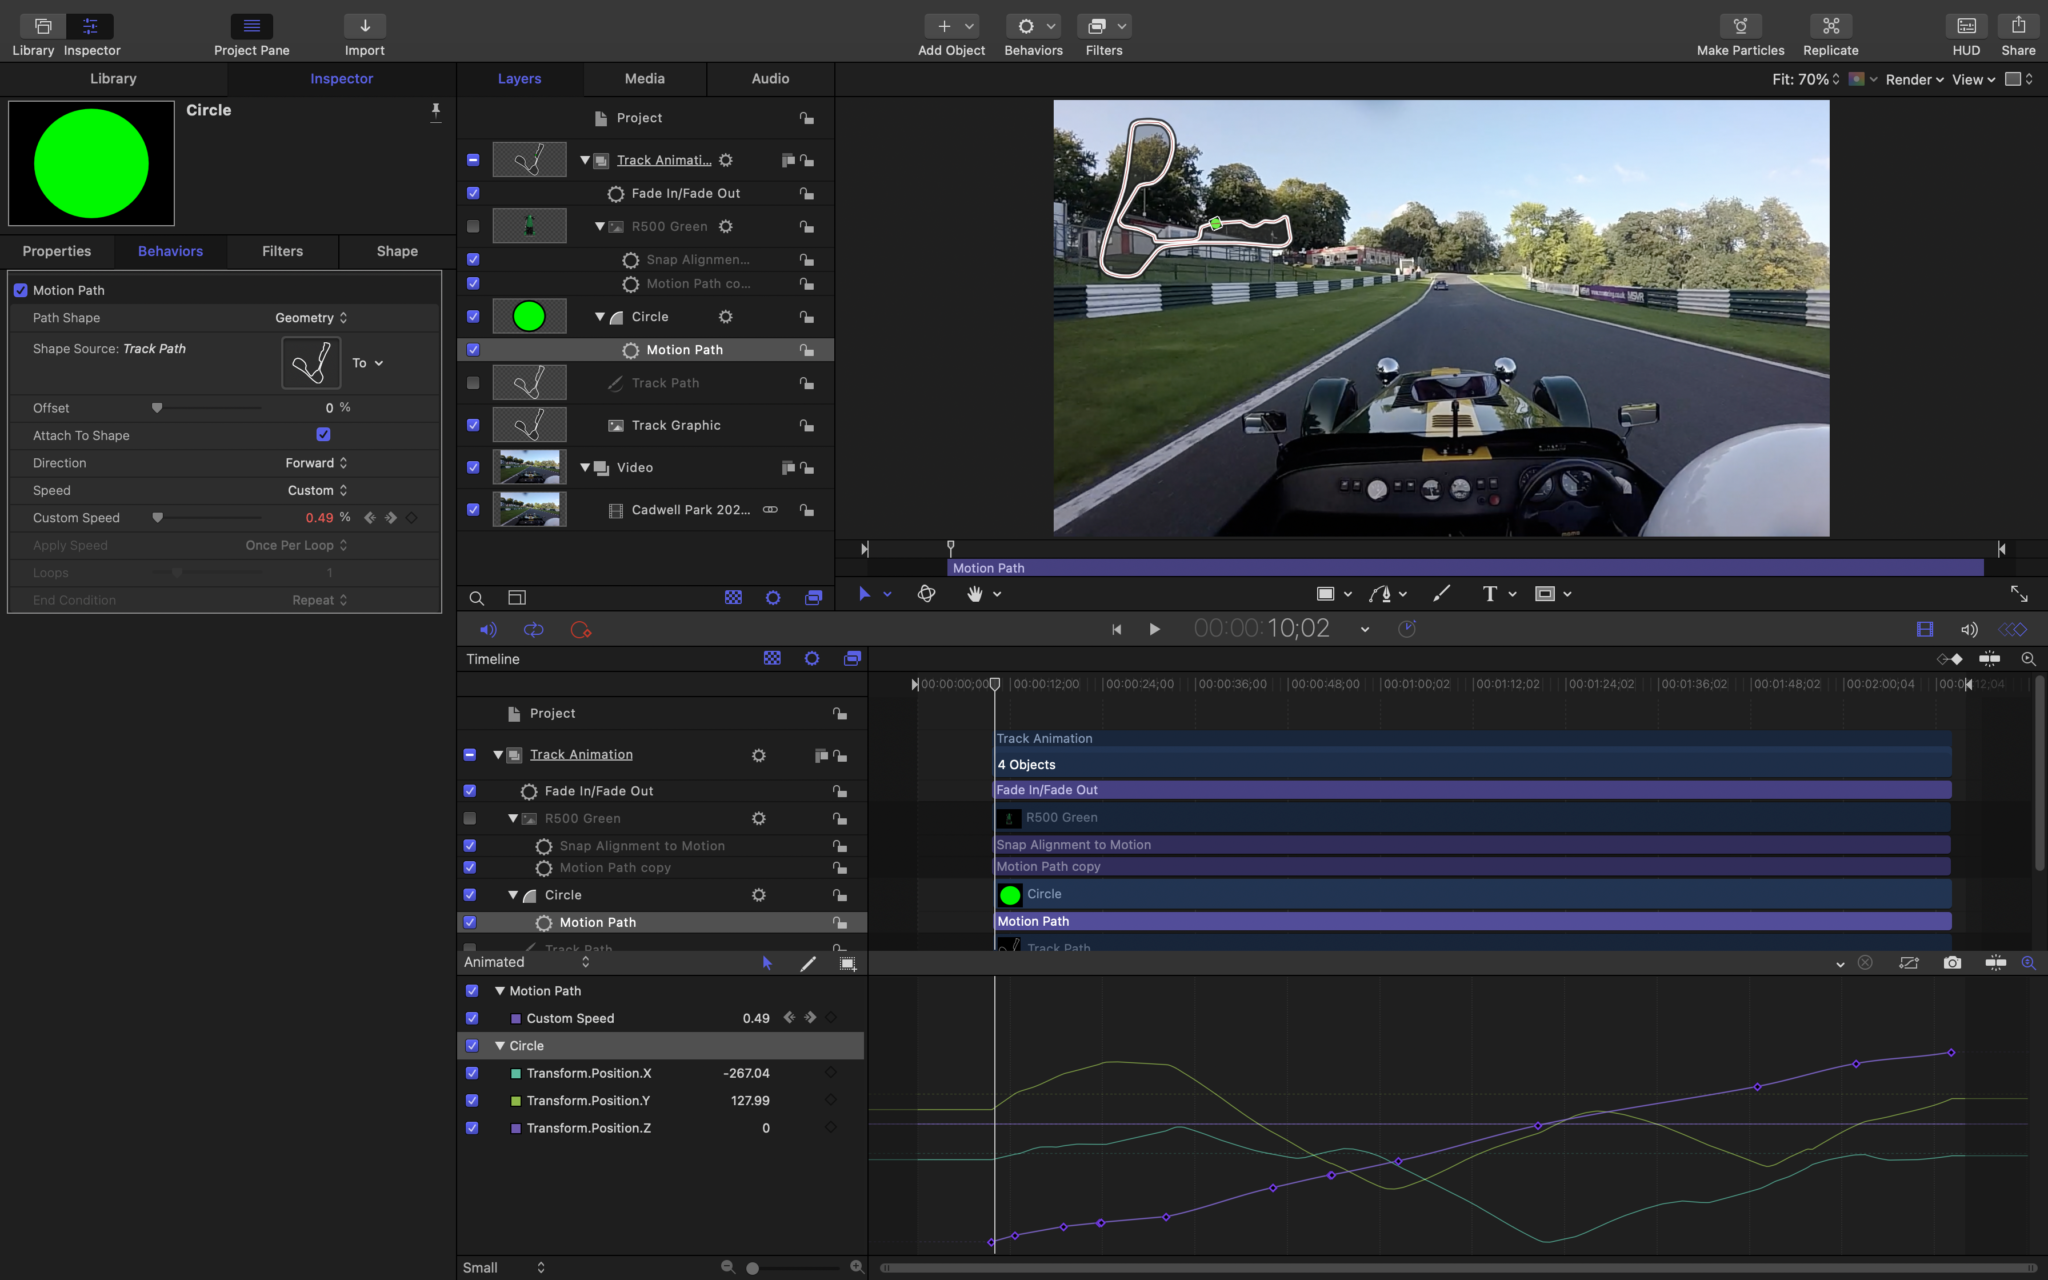
I won’t go into all the details here, but essentially my work flow for this animation was:
- Create a vector line (not an enclosed object) in Motion that was the topology of the track – the white track you see in the animation
- Make sure this vector line overlapped the start and end of the lap
- Add a Motion Path to the vector
- Set the Motion Path, Speed to Custom. This allows you to set the position of the object you’re moving (the green blob) to a percentage of the vector line length – 0% and your object (my green blob) is at the start of the line (lap), 100% it’s at the end of the line (lap)
- Add Simon’s video footage of a lap to the project
- Set the vector animation to appear at the start of the lap
- Add key frames at each corner with the Motion Path (Custom Speed) percentage to a value that made the marker appear to be at the right point of the lap
- Export the video from Motion and import it into Final Cut Pro
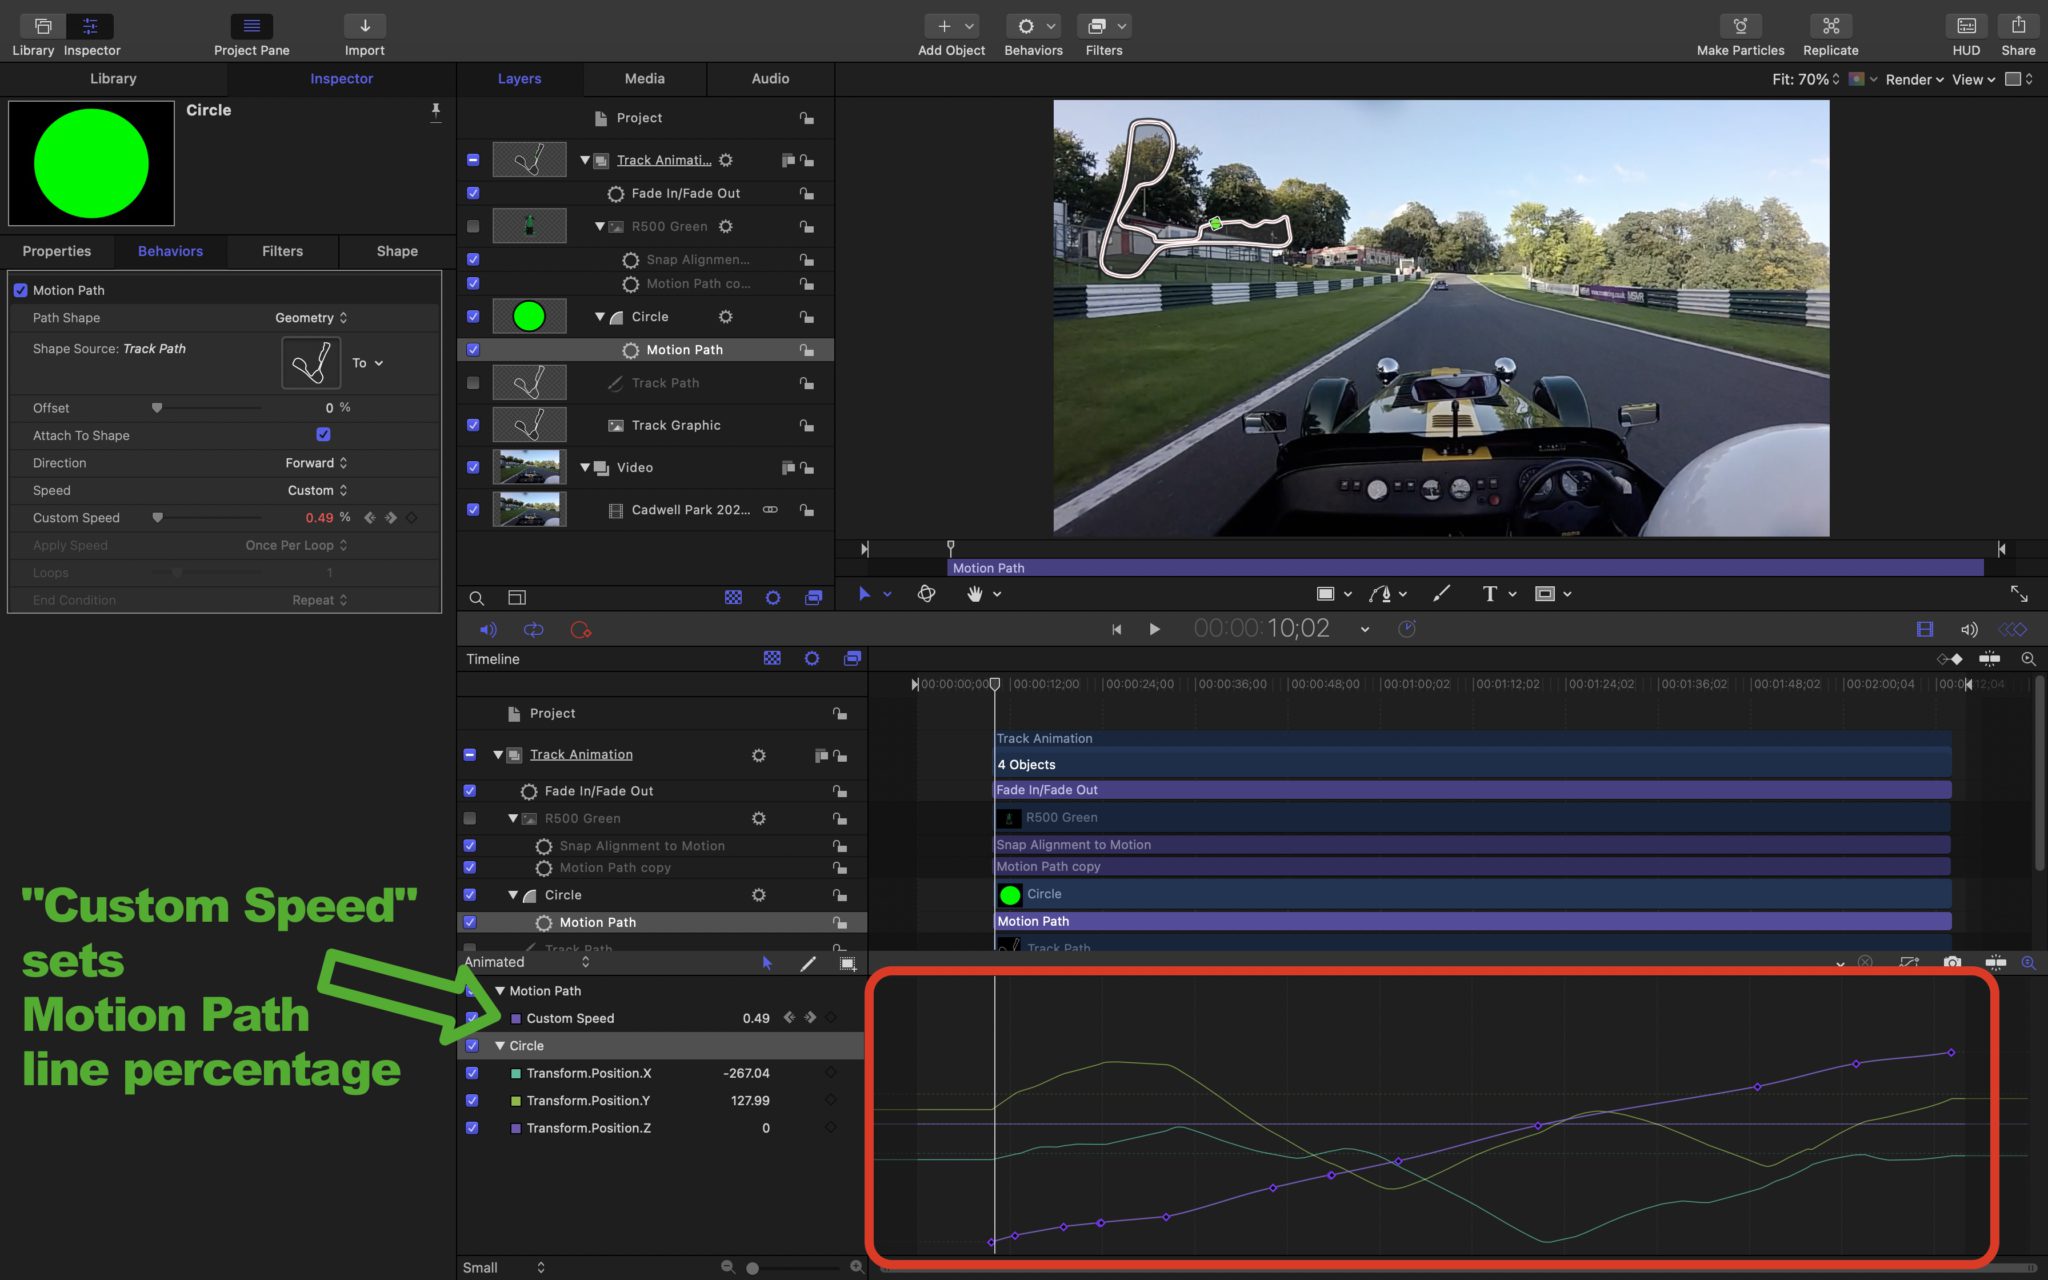
If you look closely at the bottom right of the Motion screenshot (highlighted with a red box in the image below), you can see the panel where you set the Motion Path percentage using key frames – the percentage parameter is confusingly called “Custom Speed”.
The purple line in the highlighted red box, which goes from the bottom left to the top right of the highlight, is the Motion Path percentage. Notice how its not quite a straight line. If it were then Simon would have been going round the track at a constant speed. The wiggle in the purple line shows Simon slowing down for the corners and speeding up on the straights – makes sense right?
Once I had all that done I could export the clip from Motion and then import it into Final Cut Pro.
Here’s a section of the clip once exported from Motion:
Then in the final FCP project I could add lower 3rds and set the start and end points to where I wanted them for the whole demo lap.
Here’s the same section of track footage, from above, but this time exported from the final FCP project with a lower 3rd applied as well.
And that was all the different stuff in this video. Personally, I think the overtaking and lap positioning animations both add to the Cadwell video over the Castle Combe video. But that’s possibly just me 🙂!
Hope you enjoyed some of the gory details!

Leave a Comment